How Segment can enable real-time personalization, powered by Miso.ai
Here at Miso.ai, we talk to e-commerce retailers and content media companies pretty much everyday about their tech stack and how we can help them integrate our real-time personalization ML models into their search and recommendation systems. A trend that we’ve seen time and time again is that Segment is mentioned in their tech stack as their customer data platform (CDP) of choice.
Since launching in 2011, Segment has been helping organizations consolidate their first-party customer data and pipeline it to a multitude of SaaS destinations, ranging from analytics, email marketing, performance monitoring, and more. Speaking as a DevEx Engineer, I really liked setting up my data flows using Segment’s admin dashboard and perusing their wealth of developer documentation. If you haven’t heard of Segment before, I recommend checking them out (just to be clear, Segment isn’t paying for this post and we’re not co-selling with them…we just like their product).
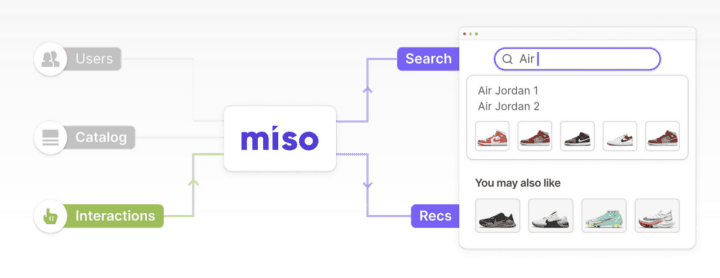
While we won’t get into all the benefits of Segment (or of having a customer data platform for that matter), a unique and powerful feature of Segment is its ability to enable real-time data flows. This is particularly valuable to us because Miso’s 1:1 personalization algorithms are behaviorally driven, on a click-by-click basis. For example, if a user performs a search, hovers over a product tile, clicks through to a product detail page, and adds the product to their cart, the full clickstream of events is immediately sent to Miso and used to predict the likelihood of their next interaction with your product catalog inreal-time.
And as we recently talked about in our system architecture post, we’re always looking for ways to streamline the integration process of Miso and so, by popular request, let’s take a look at our new Miso x Segment integration!

Here’s how it works
At a high level, the integration involves setting up a webhook in Segment to send clickstream event data to Miso. Therefore, the initial step, or rather, requirement, is to have your clickstream data available in Segment. That data might come from sources like Google Analytics, Adobe Analytics, Shopify, or natively via Segment’s JavaScript clickstream snippet.
An important caveat before we go any further is that our Segment integration assumes that your clickstream data follows Segment’s e-commerce event guidelines outlined here. If it doesn’t, don’t worry, we’ll just need to work with your team to do the schema mapping manually.
And if you’re unfamiliar with webhooks, this article provides a good overview of the topic.
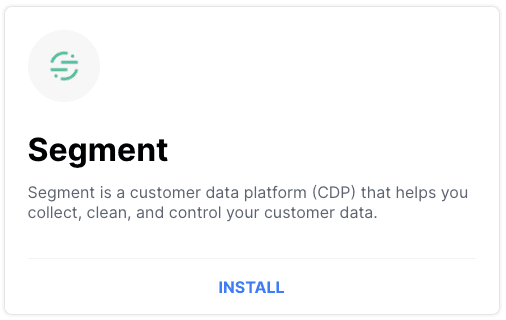
- First, we need to know the URL that tells Segment exactly where to send its data as it’s generated. Head on over to Dojo, Miso’s admin dashboard, and click on the Integrations tab. Look for the Segment tile and click Install.
- At the bottom of the page, you’ll see your webhook URL (it has a unique authentication token appended to it already). That’s what you’ll need to paste into Segment later on. Pretty easy, right?

- We’re done with Dojo for now, so let’s head over to Segment and log into their dashboard.
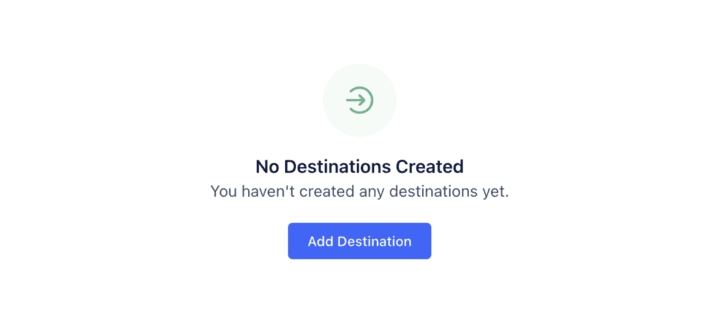
- For this integration, your clickstream data is the source and Miso is the destination. So assuming your clickstream data is already in Segment, we just need to create a new destination. From the left panel, select Destinations and Add Destination.
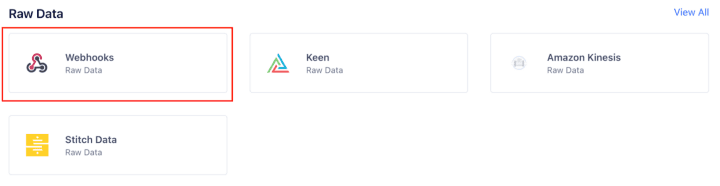
- Next you’ll see a catalog of destinations to choose from. Our destination is a webhook.
- On the following screen, you’ll see a Configure Webhooks option. Select it and continue to follow the setup wizard (at one point you’ll be prompted to select the data source for your clickstream data so be sure to have that information handy).
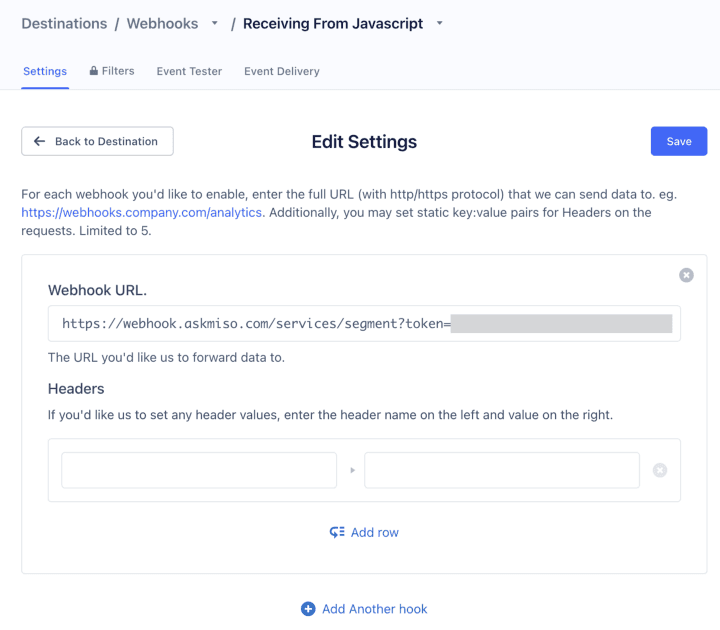
- As you continue through the wizard, you’ll eventually see a Connection Settings section with a row labeled Webhooks (max 5). Select that row and paste the webhook address (including the authorization token) from Dojo in the Webhook URL field. Then, select Save. That’s it!
- Once your webhook is configured, any new clickstream events in your source data will be pushed to Miso as they occur, enabling real-time personalization for your site.
Wait, what about everything else!?
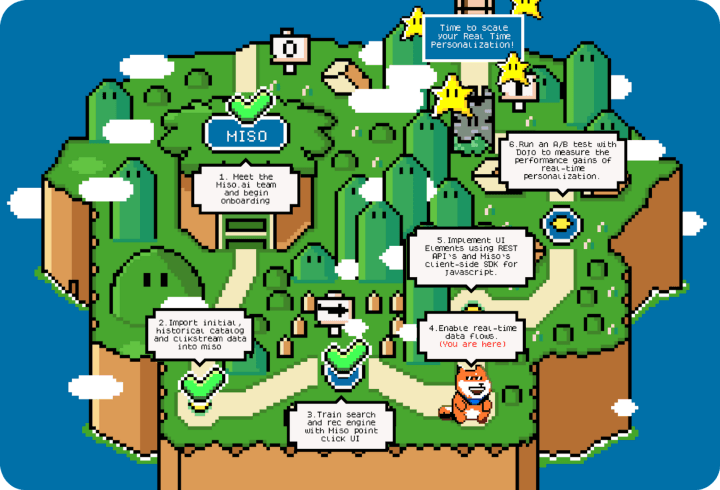
OK, so what we’ve done so far is set up a real-time data feed to push your clickstream data to Miso. And believe it or not, that’s typically the toughest milestone for teams to accomplish. Here’s a quick run-down on where that leaves us in the implementation journey:
If you enjoy this type of content, then stay tuned! We’ll be publishing more articles for every step of the implementation soon.
Closing thoughts
Let’s be real — implementing a new, 3rd party tool isn’t easy and not that much fun either. We deal with the same feelings of uneasiness ourselves when trying out new tools here at Miso. So we try our best to be mindful of that when working with your team on the integration process. That means 24/7 Slack support, bi-weekly Zoom check-ins, and an unrelenting focus on building out our docs resources for clarity and self-service.
I hope you enjoyed reading this article! I’d like to give a shoutout to Lucky Gunasekara and Lan Le for their editing expertise and Stian Johannessen for his design work (seriously, how cool is that Super Miso World map!?) If there’s an integration (or any other topic, really) that you’re curious about and want us to unpack, drop us a line on our contact form or at hello@askmiso.com. We’d love to hear about what you’re working on and how we can help!
