Engines
Engines are machine learning models that deliver real-time predictions to optimize for certain user interactions and thus drive your conversion goals. They are trained on your historical data sets to know how to connect your site's users and visitors with just the right products and content they're looking for in the moment. There are two types of engines in Miso: Search engines and Recommendation engines. You can learn more about how engines work in our guide to Understanding Your Engines.
In Dojo, you can do the following:
- Set up engines to optimize for certain interactions
- Delete engines
- Adjust settings for engines (such as changing the training cadence)
- Access each engine's Sandbox for exploring the search results or product recommendations directly in the UI, no API calls needed
- See an Overview of your engine's activity and performance
Creating an engine
First, select the type of engine that you'd like to create (Search or Recommendation). If you don't currently have any engines of this type, you will be taken straight to the engine setup page.
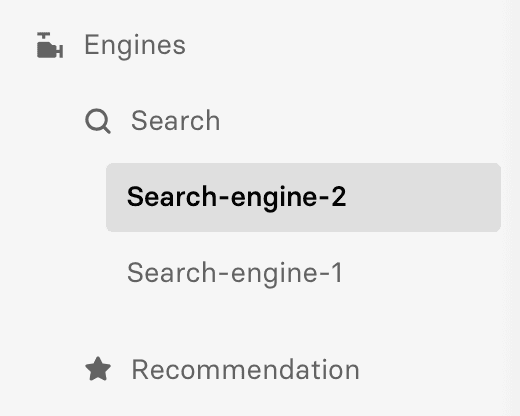
Miso allows you to create multiple search engines and multiple recommendation engines. To create an additional search or recommendation engine, go to the page for one of your existing engines of the same type. From there, click on Settings in the upper right, then click Create new engine. You'll be taken to the engine setup page.

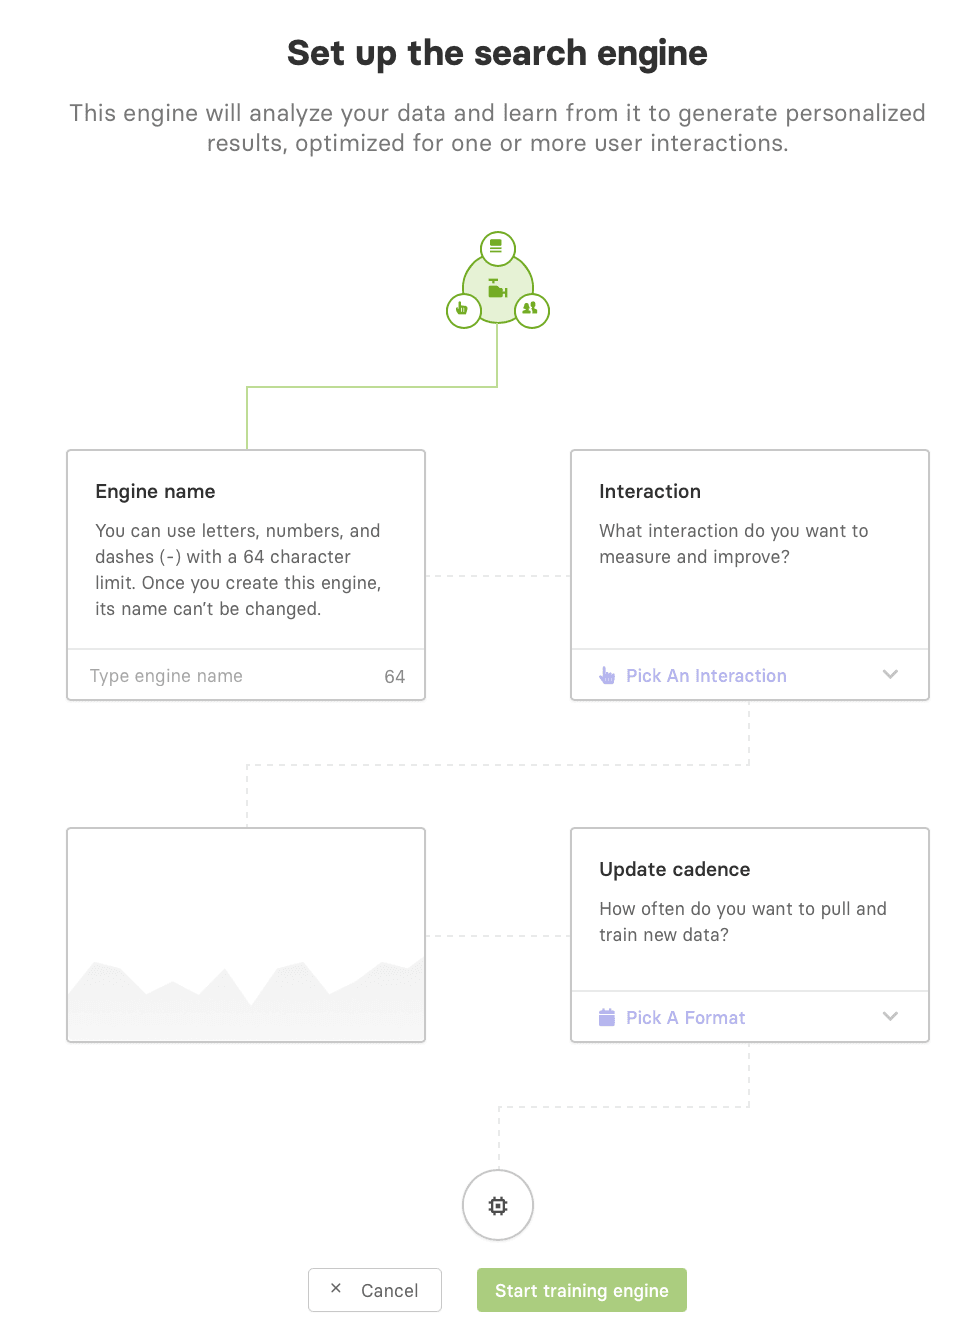
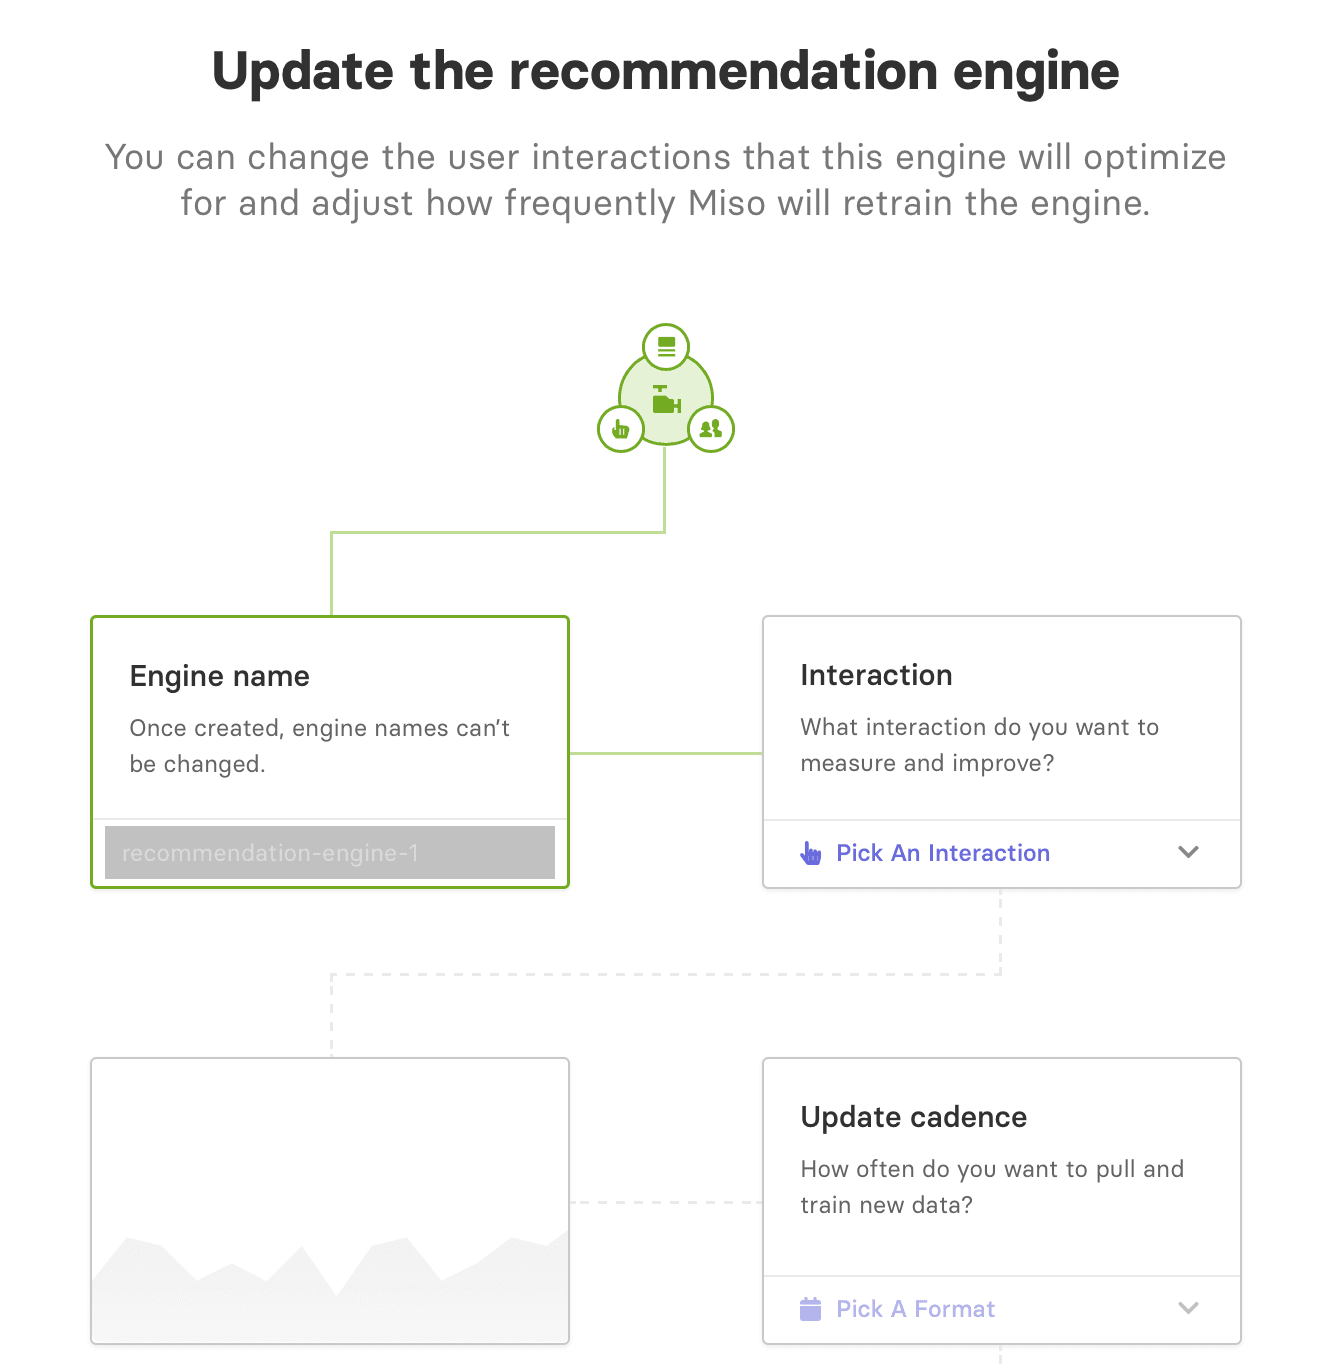
1. Enter an engine name
On the engine setup page, begin by choosing a name for your engine. Note that you won't be able to change this name after the engine is created.
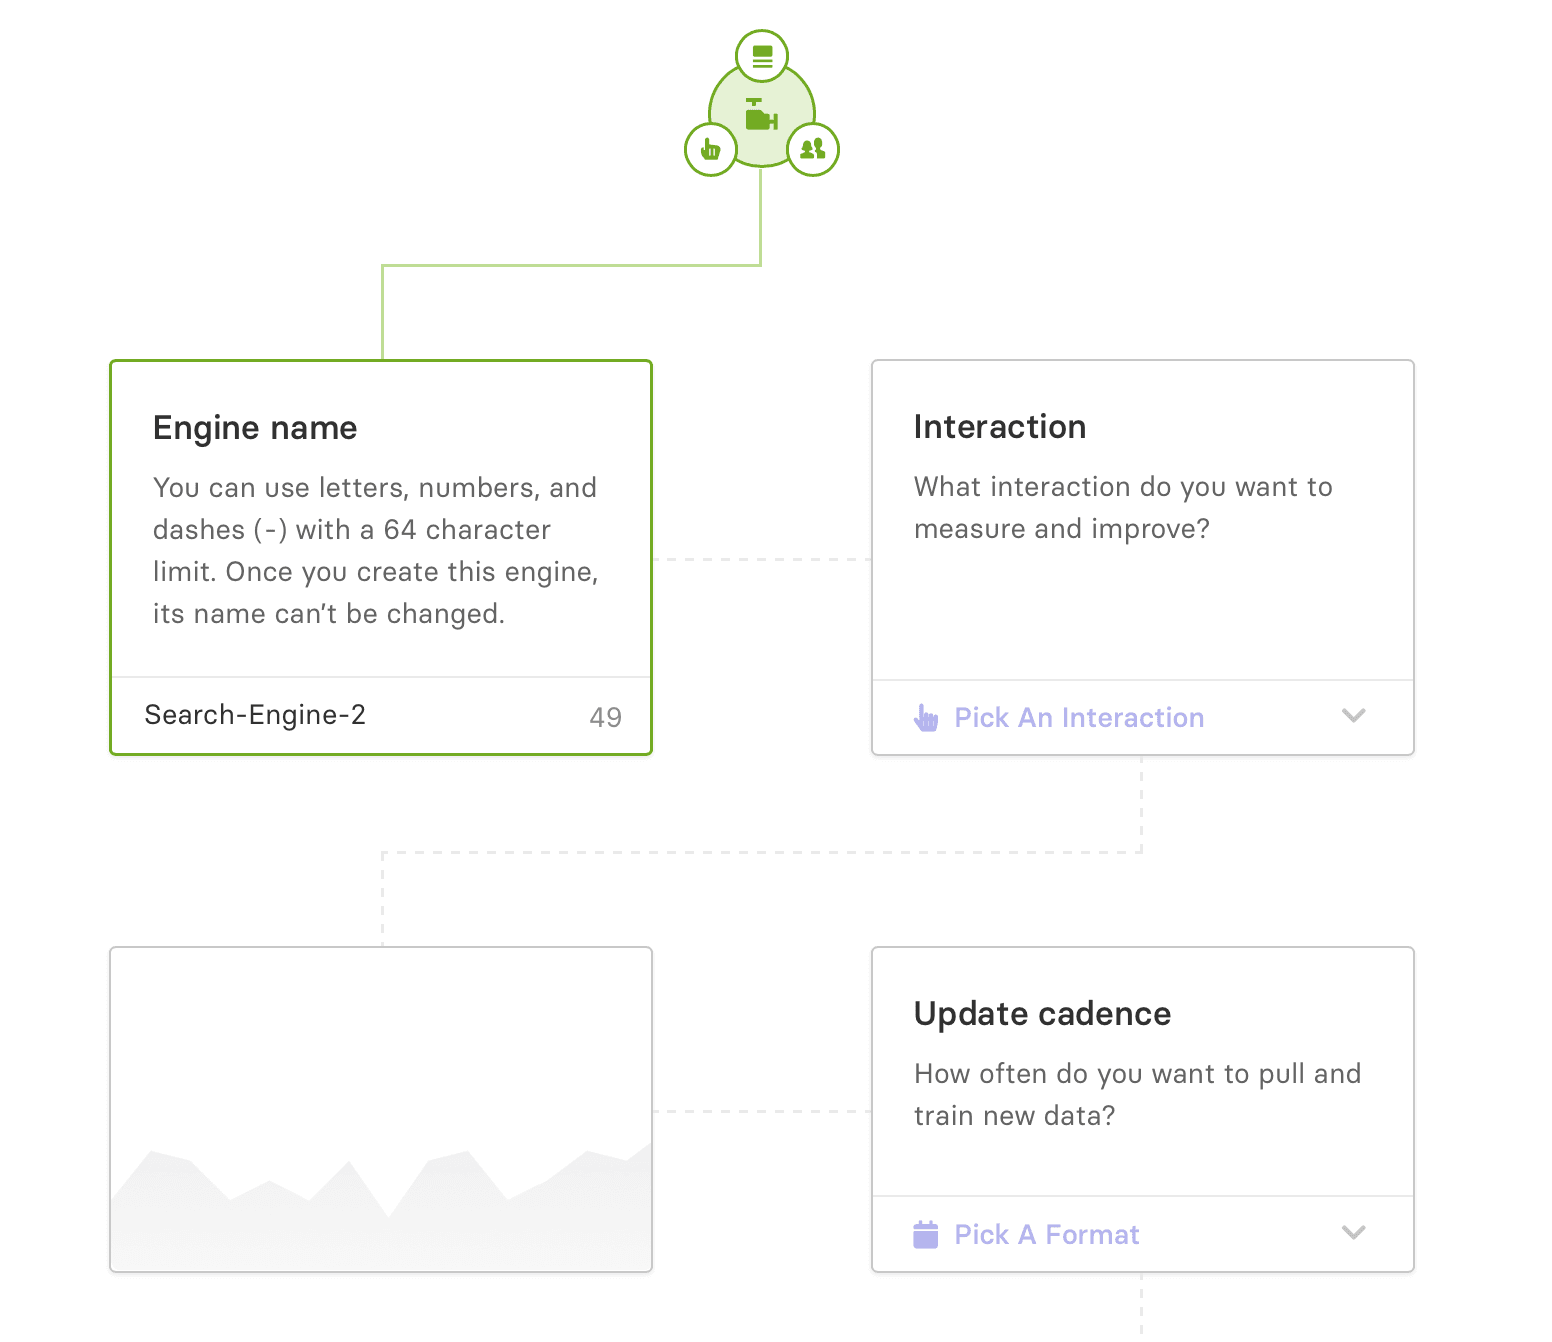
2. Select one or more interactions to optimize for
When you click Pick an Interaction, you will see a list of interaction types that appear in your Interactions dataset. The type that you select tells the engine to return results that are likely to lead to that interaction. By optimizing for high-value interactions on your site, like checkouts or views, you can use Miso to drive conversions and revenue.
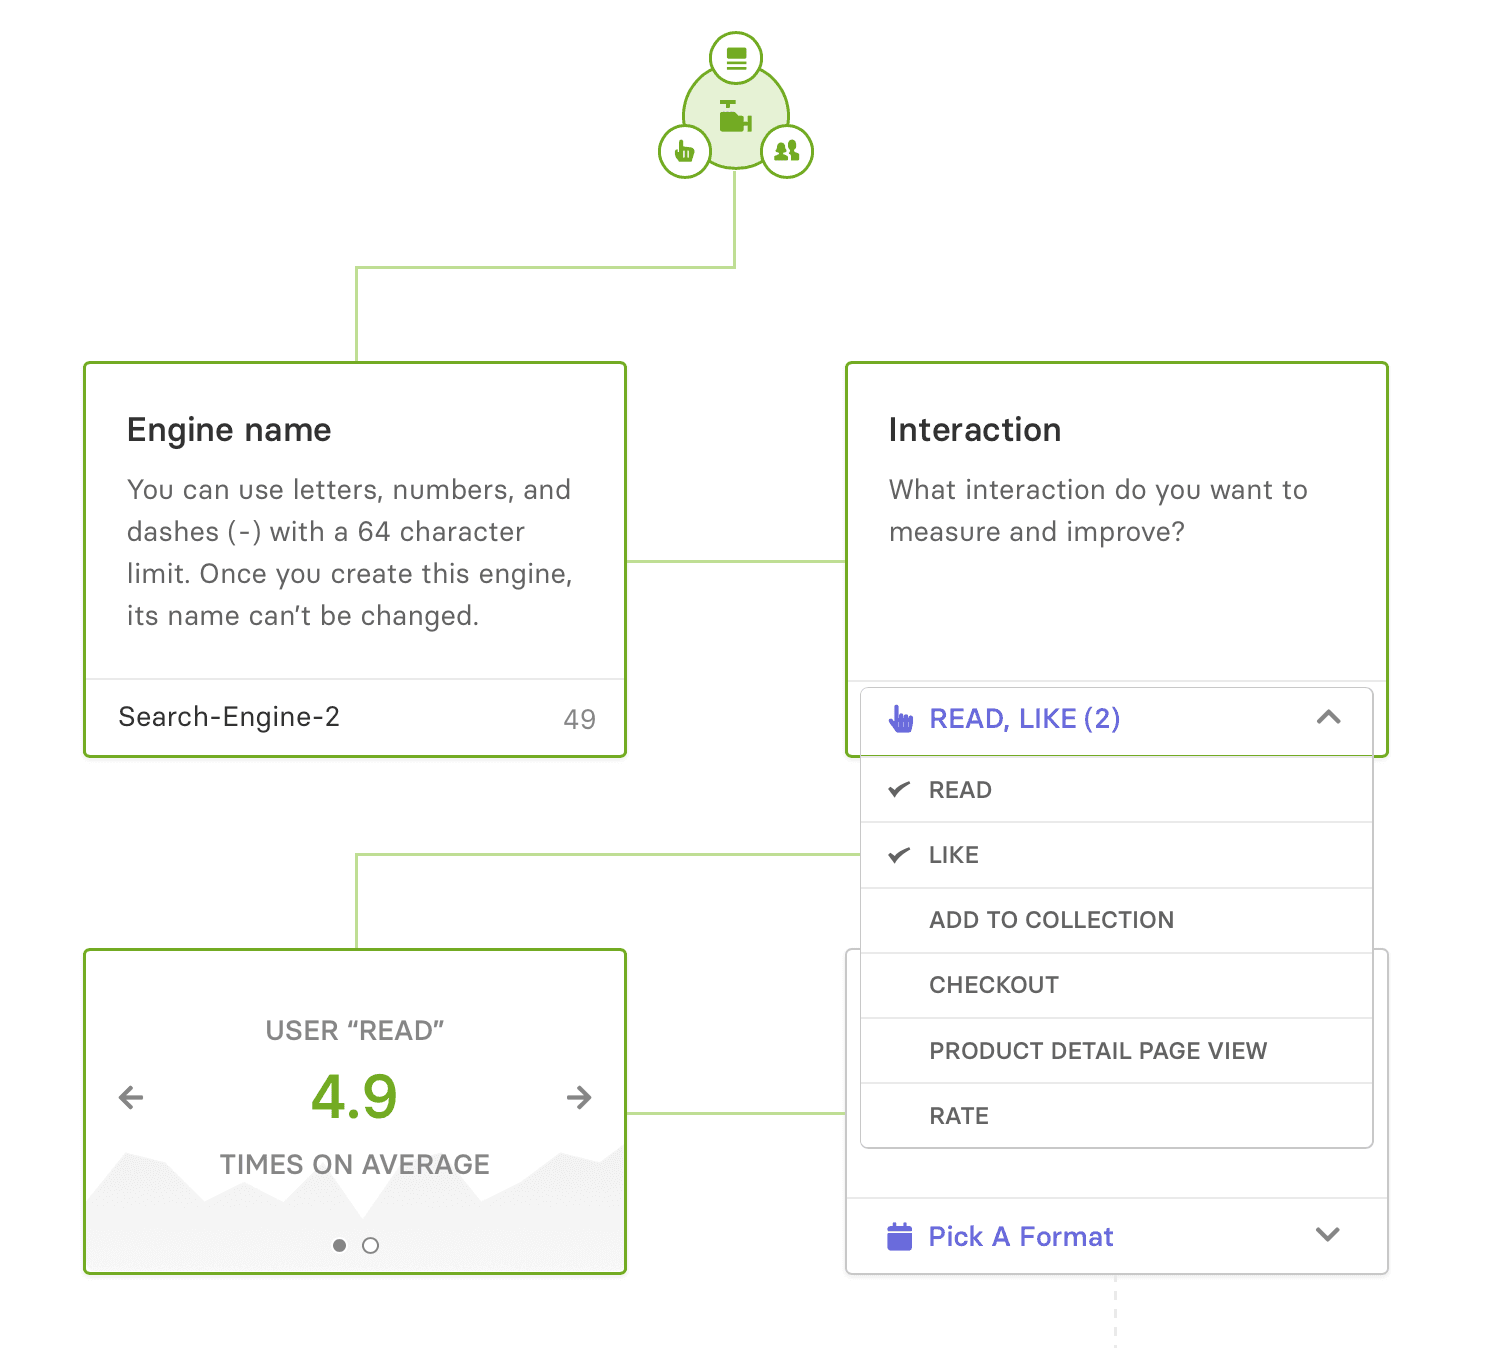
The box on the bottom-left shows a baseline metric for the chosen interactions, derived from your historical data sets.
add_to_cart
and
checkout
. For content media, it can be
read
or
watch
in combination with
product_detail_page_view
.
3. Choose an update cadence for retraining
When you click Pick a Format, you will see a list of possible schedules for training your engine. Miso will automatically retrain the engine on the schedule that you choose. More frequent retraining is useful if you have a lot of data coming in and need to refresh your engine often.
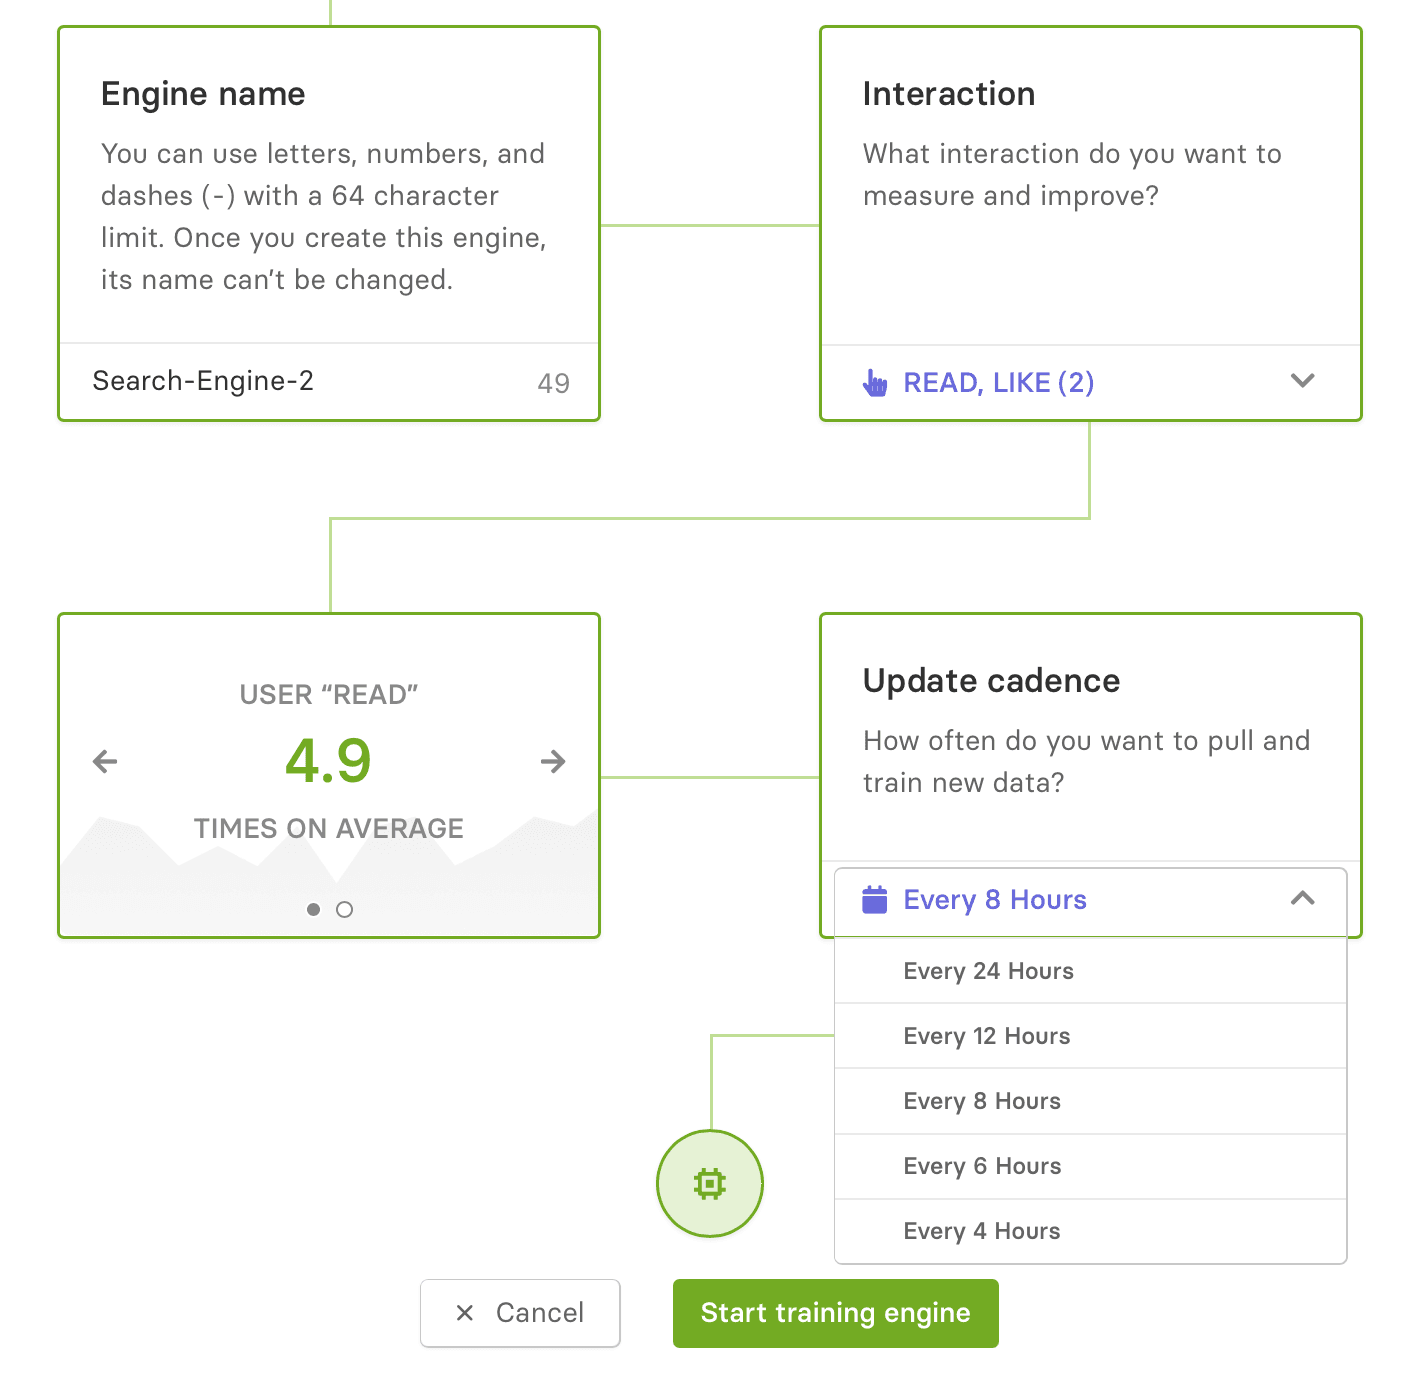
4. Start training engine
Once you've made your selections, click Start training engine. You'll be taken to a page showing the progress of your engine training.
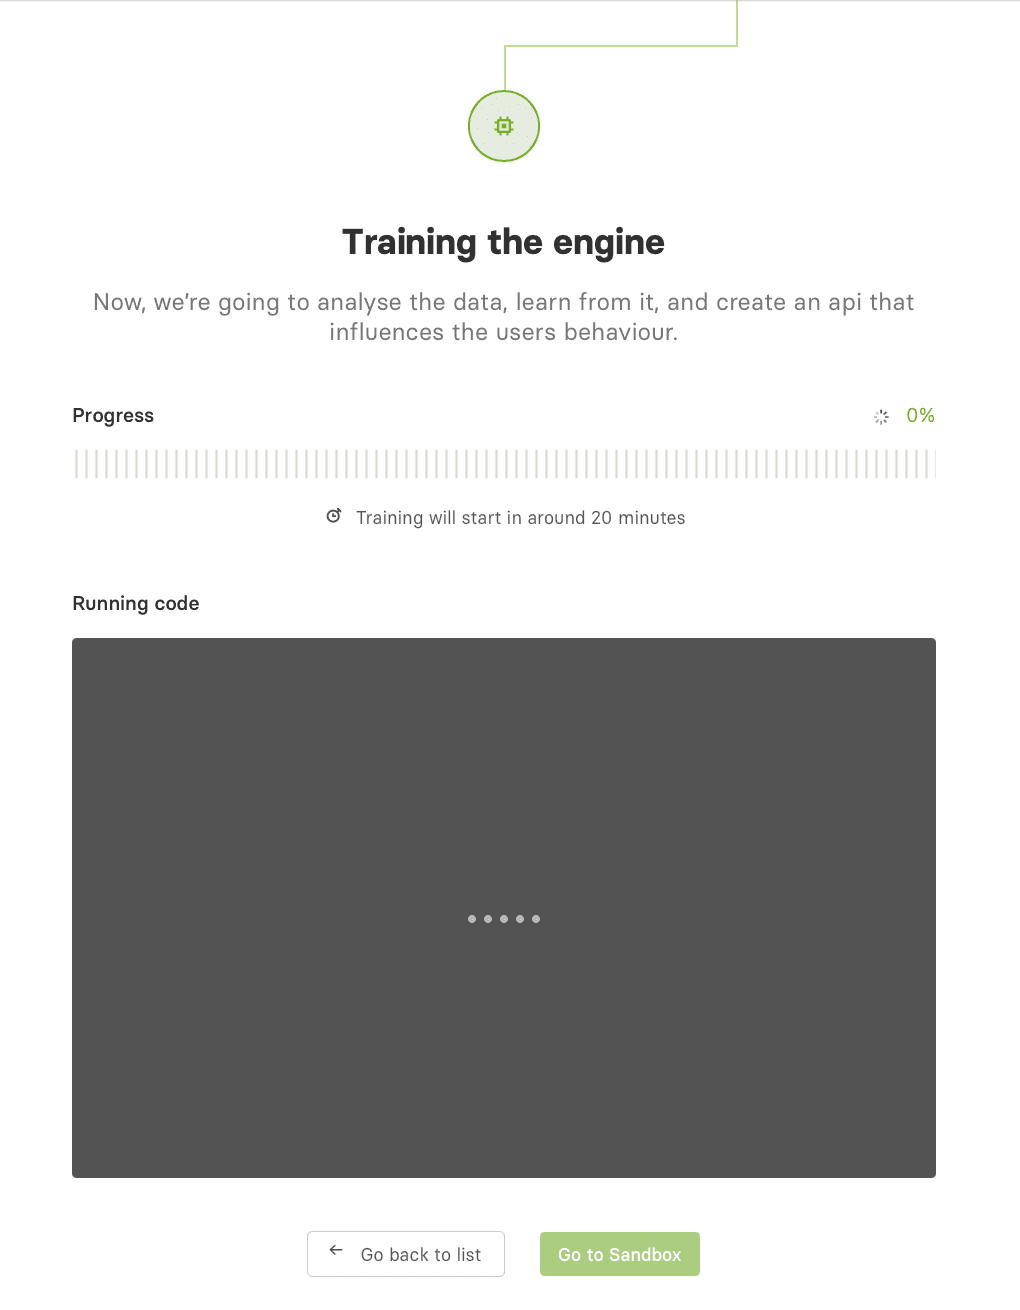
Initial training can take up to a few hours, depending on the size of your data. If you experience any issues during training, contact your Miso solutions engineer.
Once the engine training is complete, you'll be taken to the engine page where you can find the Sandbox and Overview. If you have just one engine, you can access its page by clicking on Search or Recommendation. If you have multiple engines, their pages will appear in a list under each category.
Changing the default engine
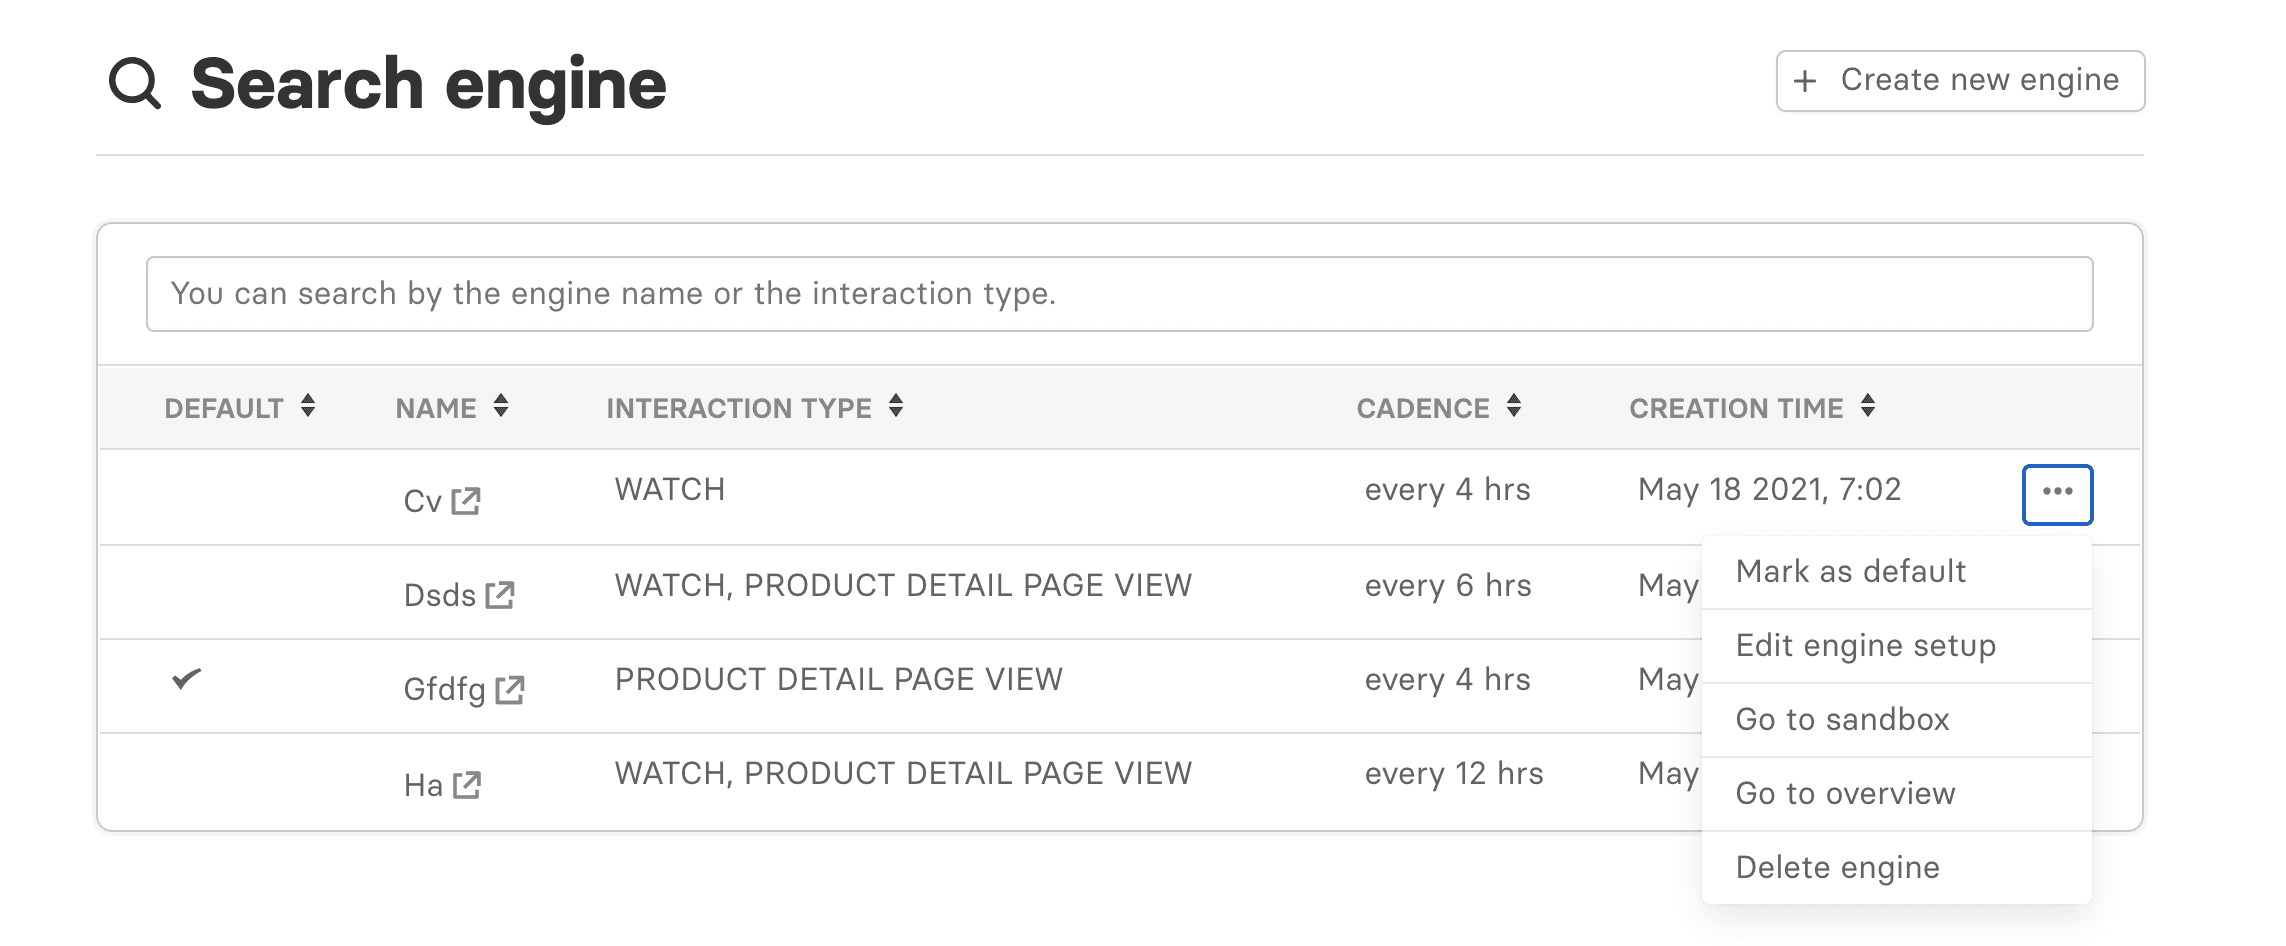
When you have more than one engine, clicking on Search or Recommendation page in the Engines menu will take you to a list of your engines.
By selecting one of your engines and then using the More menu (. . .) you can choose to mark an engine as the default. When calling Miso's Engine APIs, the default engine will be used unless you pass in the engine_id parameter.
Deleting an engine
If you wish to delete an engine, go to its page and then click Settings in the upper right. Next, click Delete engine. You'll be prompted to confirm this action.

Adjusting the settings for an engine
After you create an engine, you can edit the setup at any time. From an engine page, click Settings in the upper right, then click Edit engine setup.
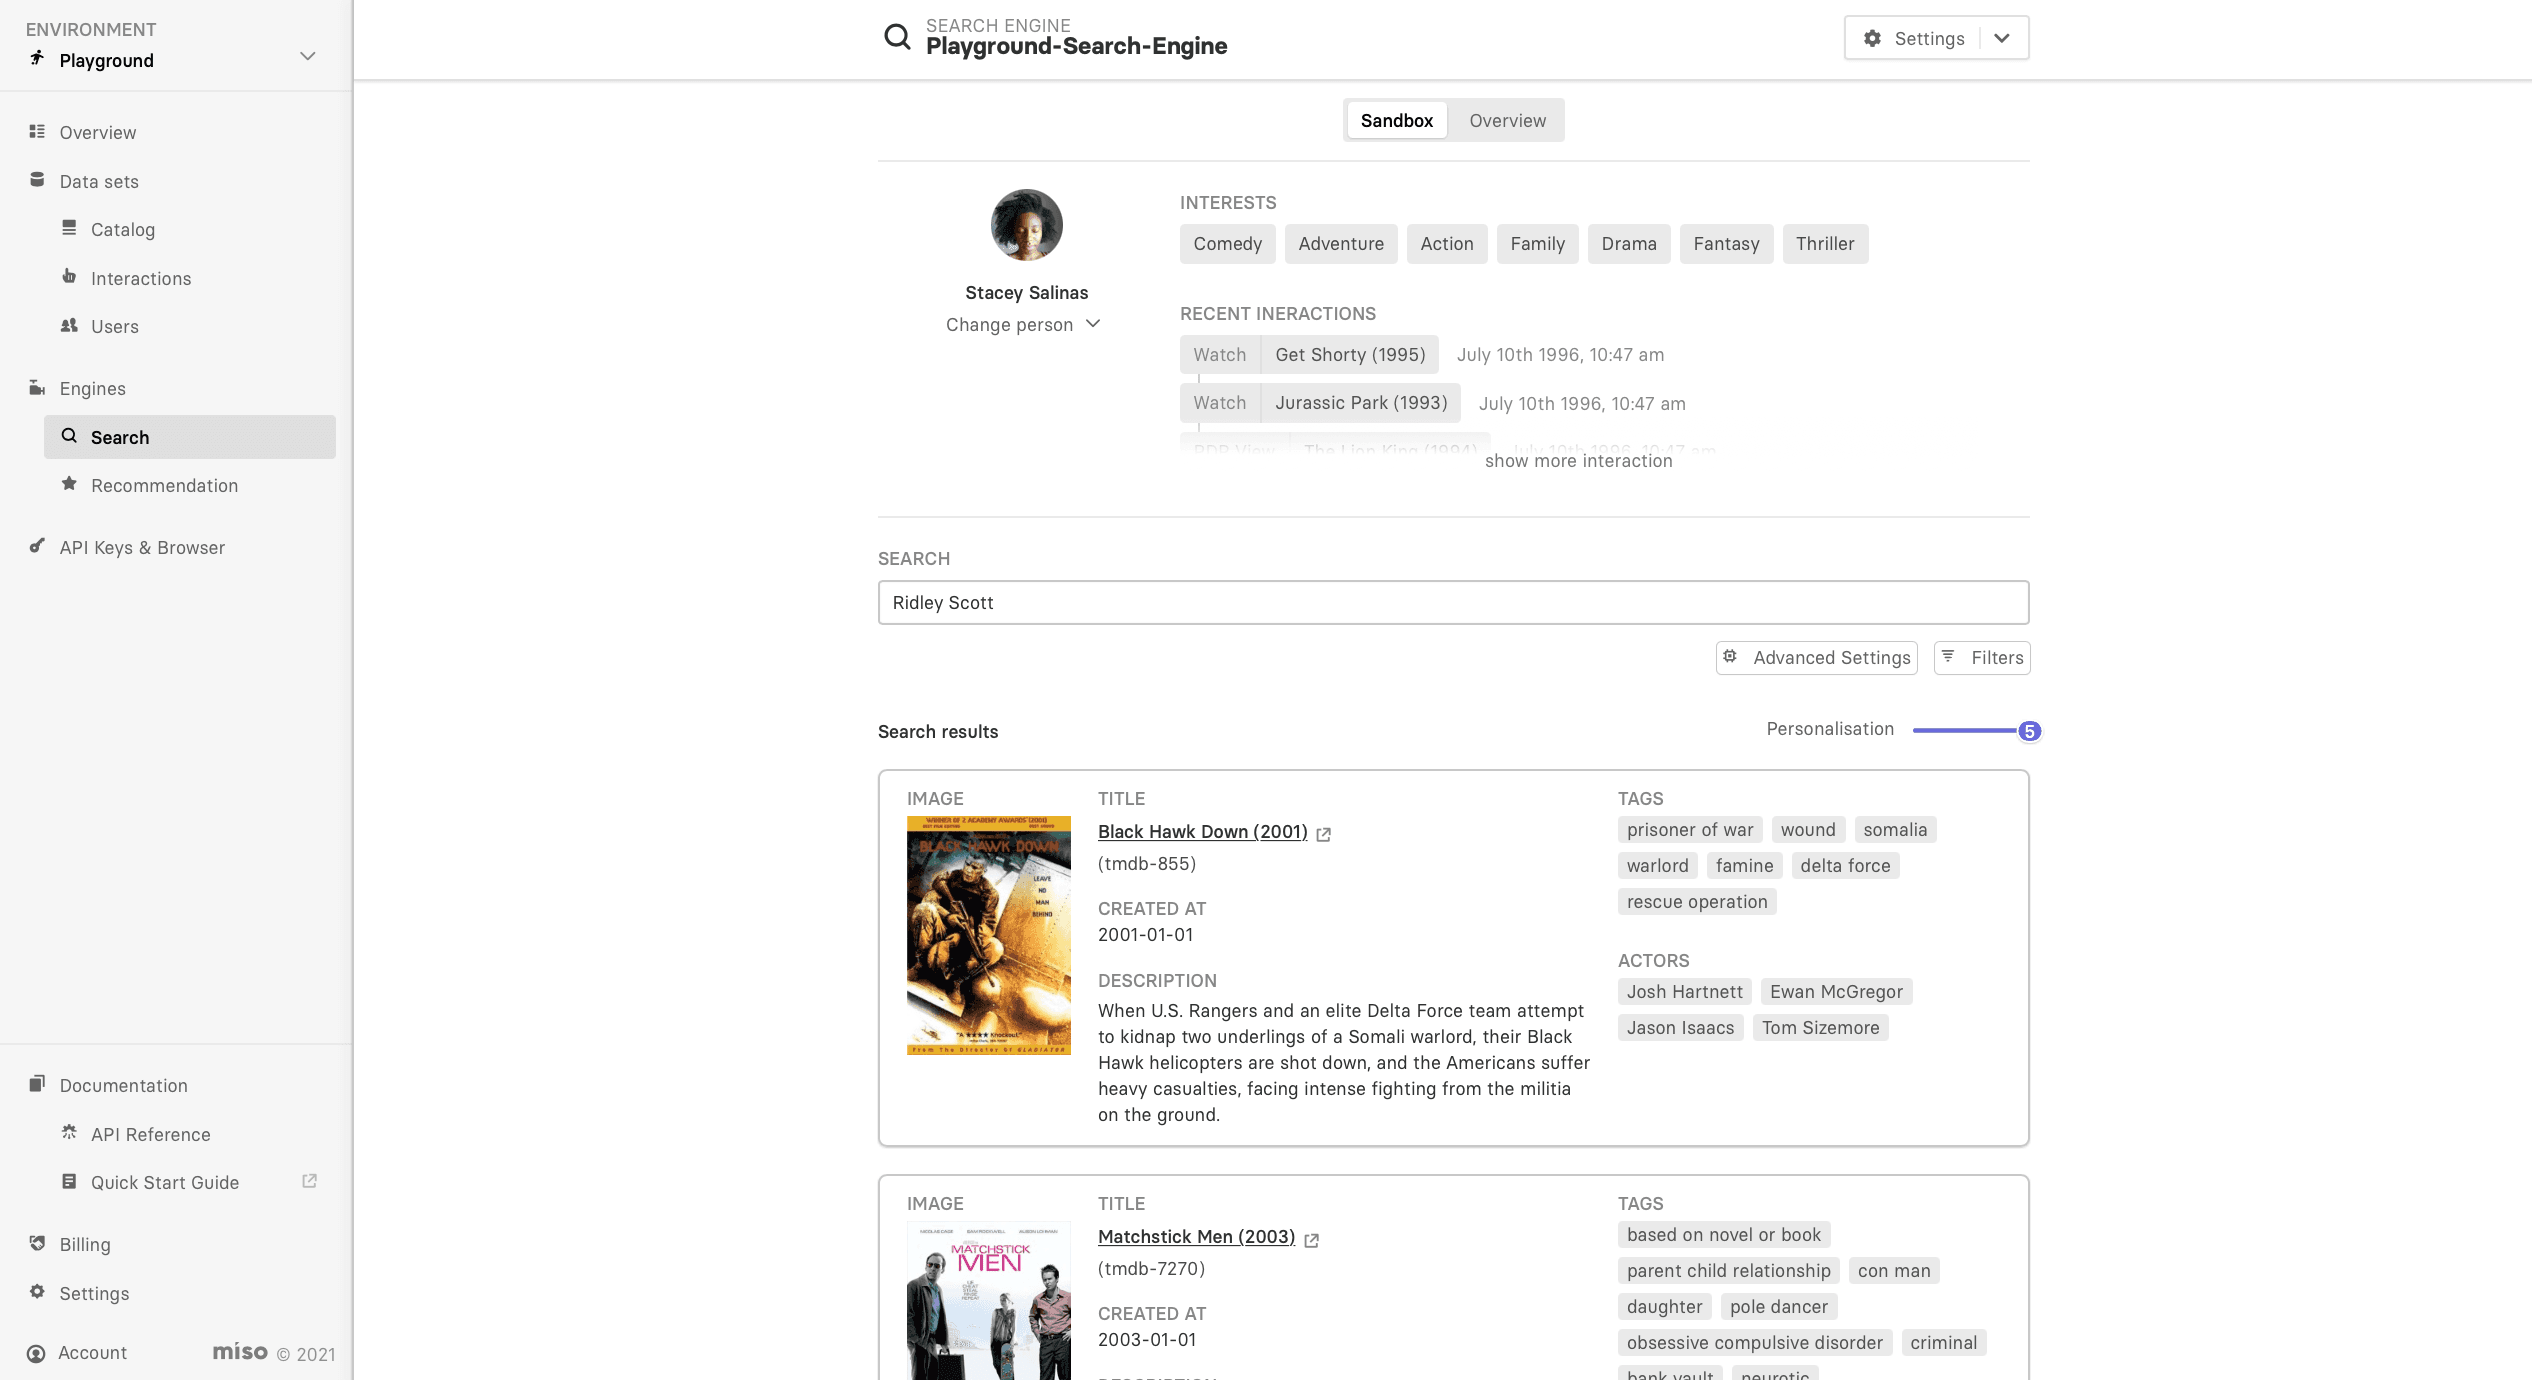
Engine sandbox
You can access your engine sandbox by going to the engine page. Your engine sandbox is a way to test out your engine results without writing any code. Every environment in Dojo has a sandbox for doing basic validation. In the sandbox, you can preview what your engine returns for different users and different inputs.
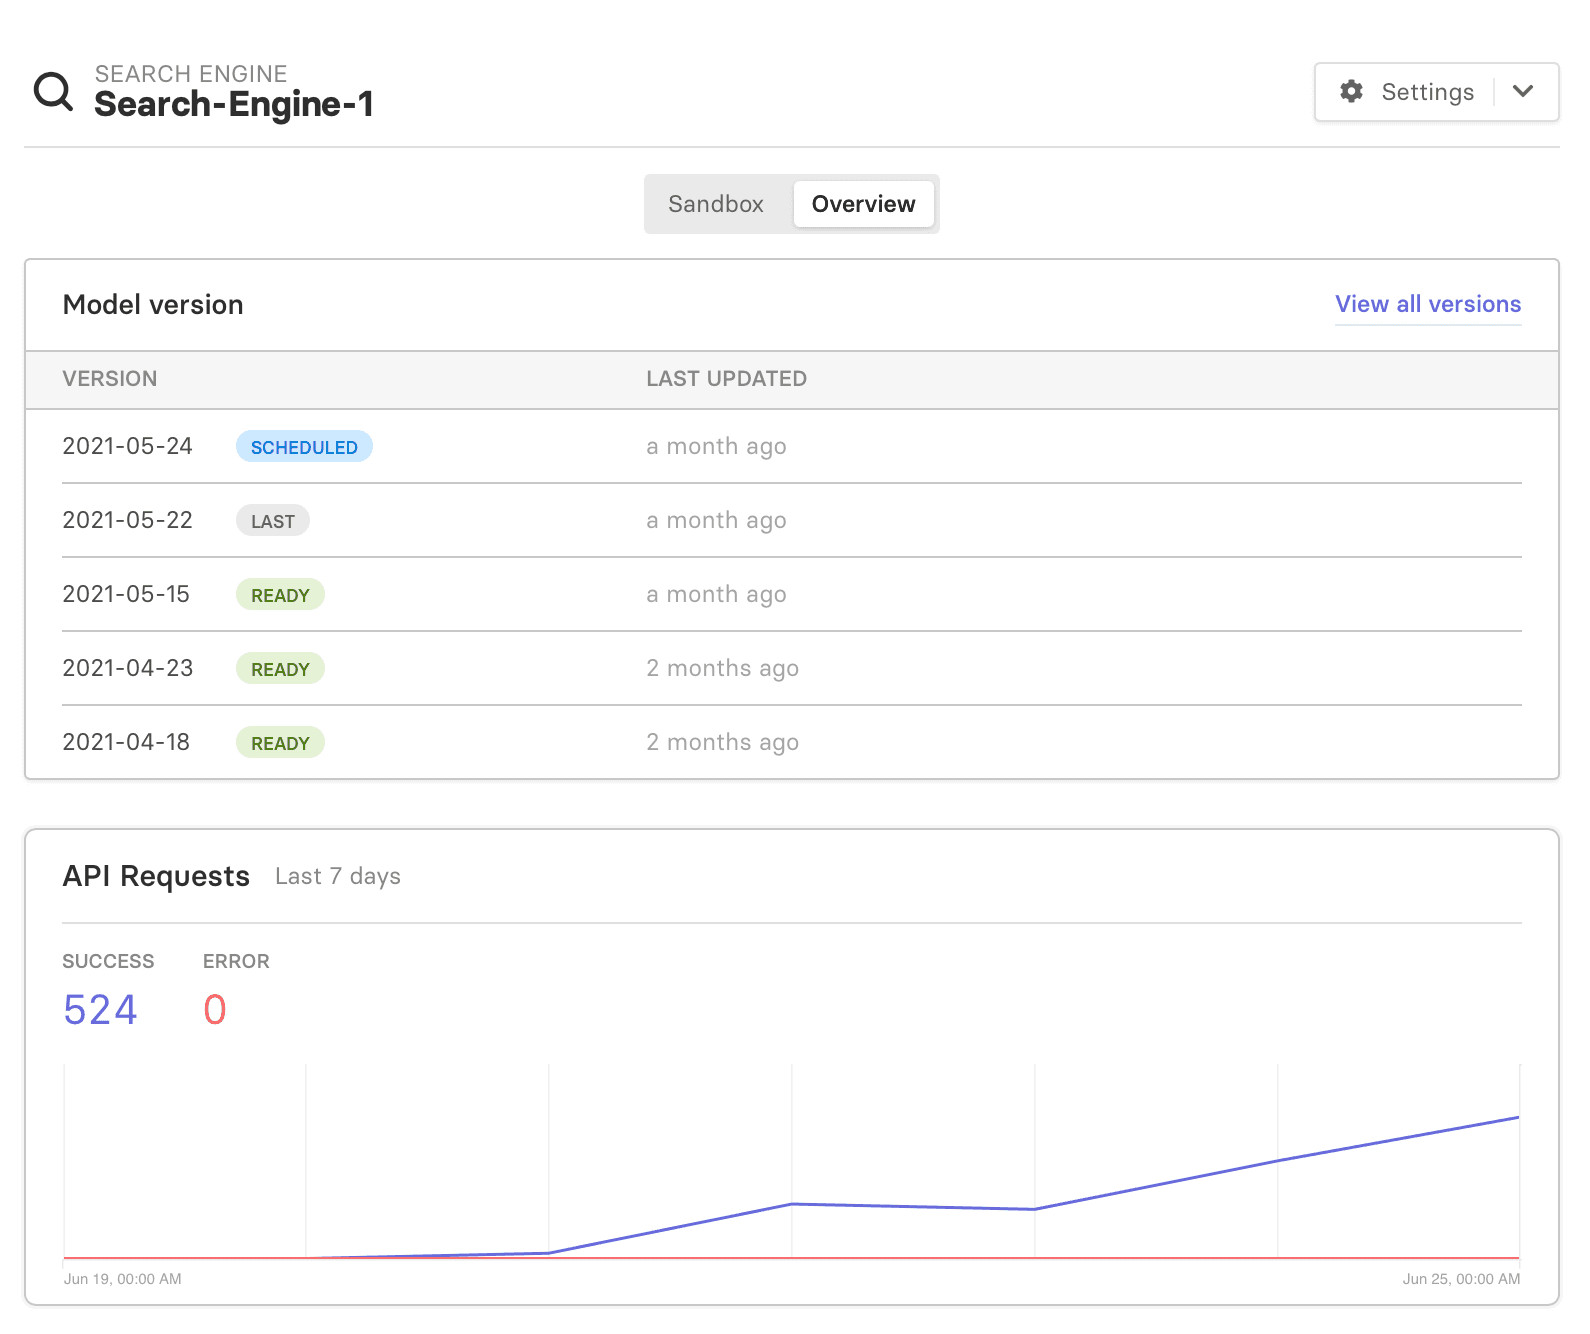
Engine overview
To view the overview for an engine, go to the engine page and click Overview (next to Sandbox). You will see information about the models your engine uses and the number of API successes vs. errors over time.